
I’ve been doing film photography for a couple years now with a few different cameras. I started out with a toy camera called a Holga 120, meaning that it takes 120 film and is a medium format camera. While fun, this camera does not produce the best images as everything is plastic, including the lens.
Earlier this year I acquired a Yashica Mat124G, which is a twin lens reflex camera. There is one lens that is just for the viewfinder, which you have to look in from the top of the camera in order to use. There is a second lens that is for taking the photo.
Once I got this camera, I became addicted to medium format photography. The photos are just so much bigger and have a different quality to them. The Yashica is a 6x6cm square format while the Hasselblad is a 6×4.5cm. Having a square format can be challenging as it causes me to find different framing and tending to shoot with symmetry in mind. Since I had only been shooting on square format, having the opportunity to use the Hasselblad and 6×4.5 was great.
Shooting film can start to get expensive with development costs, so I decided to just do it at home! I purchased chemicals to be able to develop Black and White negatives on my own.
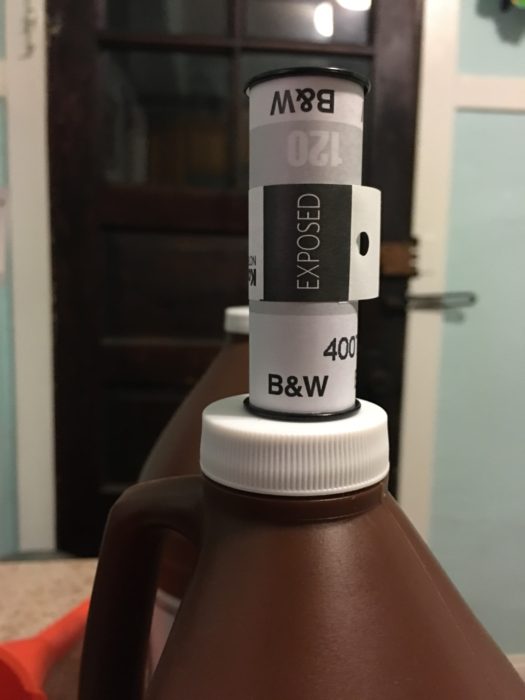
If you aren’t completely set on hand making prints from the negatives, you don’t even need a darkroom! I got a changing bag from B&H and now have a darkroom just for my hands as I put the negatives on the reel and into the development tank. It’s fairly easy once you get the hang of it, although the first few rolls can be tough since you are doing everything by feel.
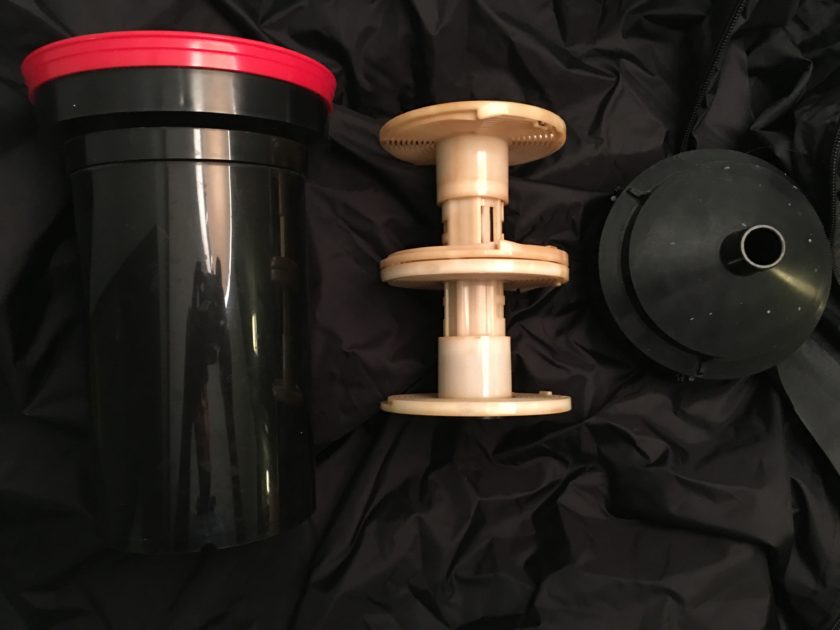 Once the film in on the reel and you are 100% certain that everything is closed, you can take it out of the changing bag and move onto developing! I found this great website for info on developing black and white film, either 35mm or 120.
The Steps:
- Pre-soak for 5 min with water. The water will come out a dark blue, this is fine.
- Pour in 500ml Developer. I use Kodak D-76 that I mixed from a powder. I do not dilute it when developing. You absolutely can, but it will take longer. My film is Kodak TMAX 400. According to this development chart, I need to develop for 8 minutes if it is at 68 degrees. This is generally the time I develop for as long it’s close to that temp. Black and white developing is forgiving. Make sure you are agitating every 30 seconds. I invert the tank to do this.
- Pour in 500ml Stop Bath. Agitate for 1 minute
- Pour in 500ml Fixer. Agitate every 30 seconds for 5-10 minutes. I generally do 10 minutes just to be sure.
- The film is no longer sensitive to light. You can pull out the reel and take a look. Run it under water for a few minutes to get rid of chemicals.
- Optional Step: HypoClear. I like using this as it will remove any purple tint that remains from the fixer. use at a 1:4 dilution. Agitate for 2 minutes
- Run under lukewarm water for awhile. You need to be sure that all chemicals are gone
- I then put a few drops of Photo-Flo in the tank and let stand for 1 minute. This helps water run off the negative during drying and won’t leave water spots.
- Hang to dry in a dust free environment for ~8 hours!
Once the film is dry, I cut it into sections of 4 photos and prepare it to be scanned. I have a Canoscan 8800f film scanner and at the moment use the stock software that came with it and then send it to Lightroom for adjustments.
Here are some of the photos:
 Nate Bartlett
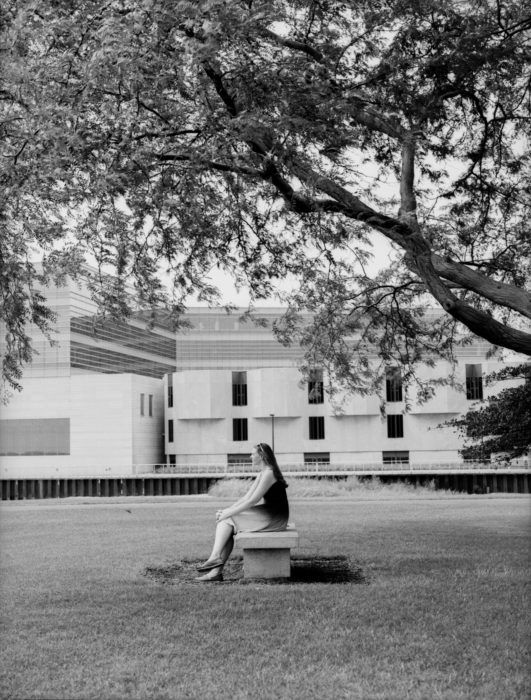 Laura Geringer
 Visitor’s Center Parking
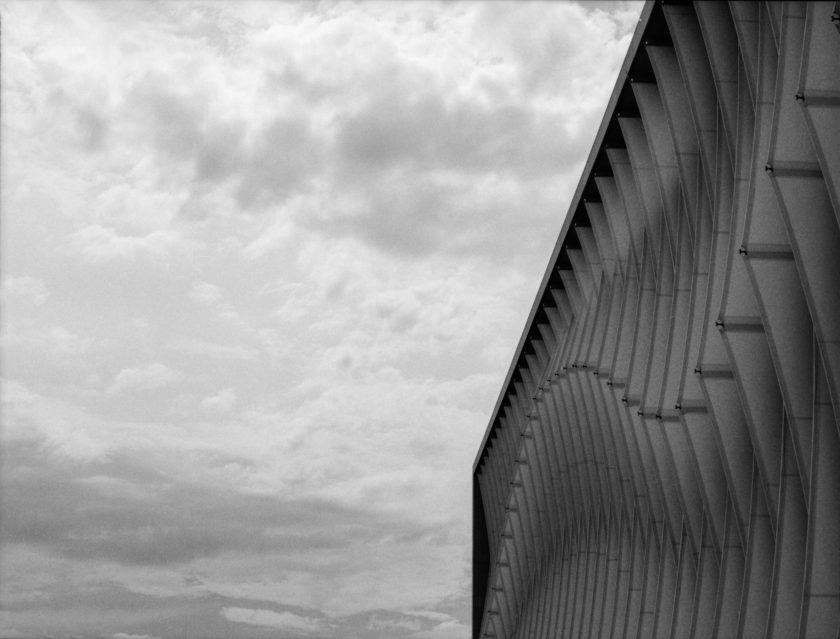
 Bienen School of Music